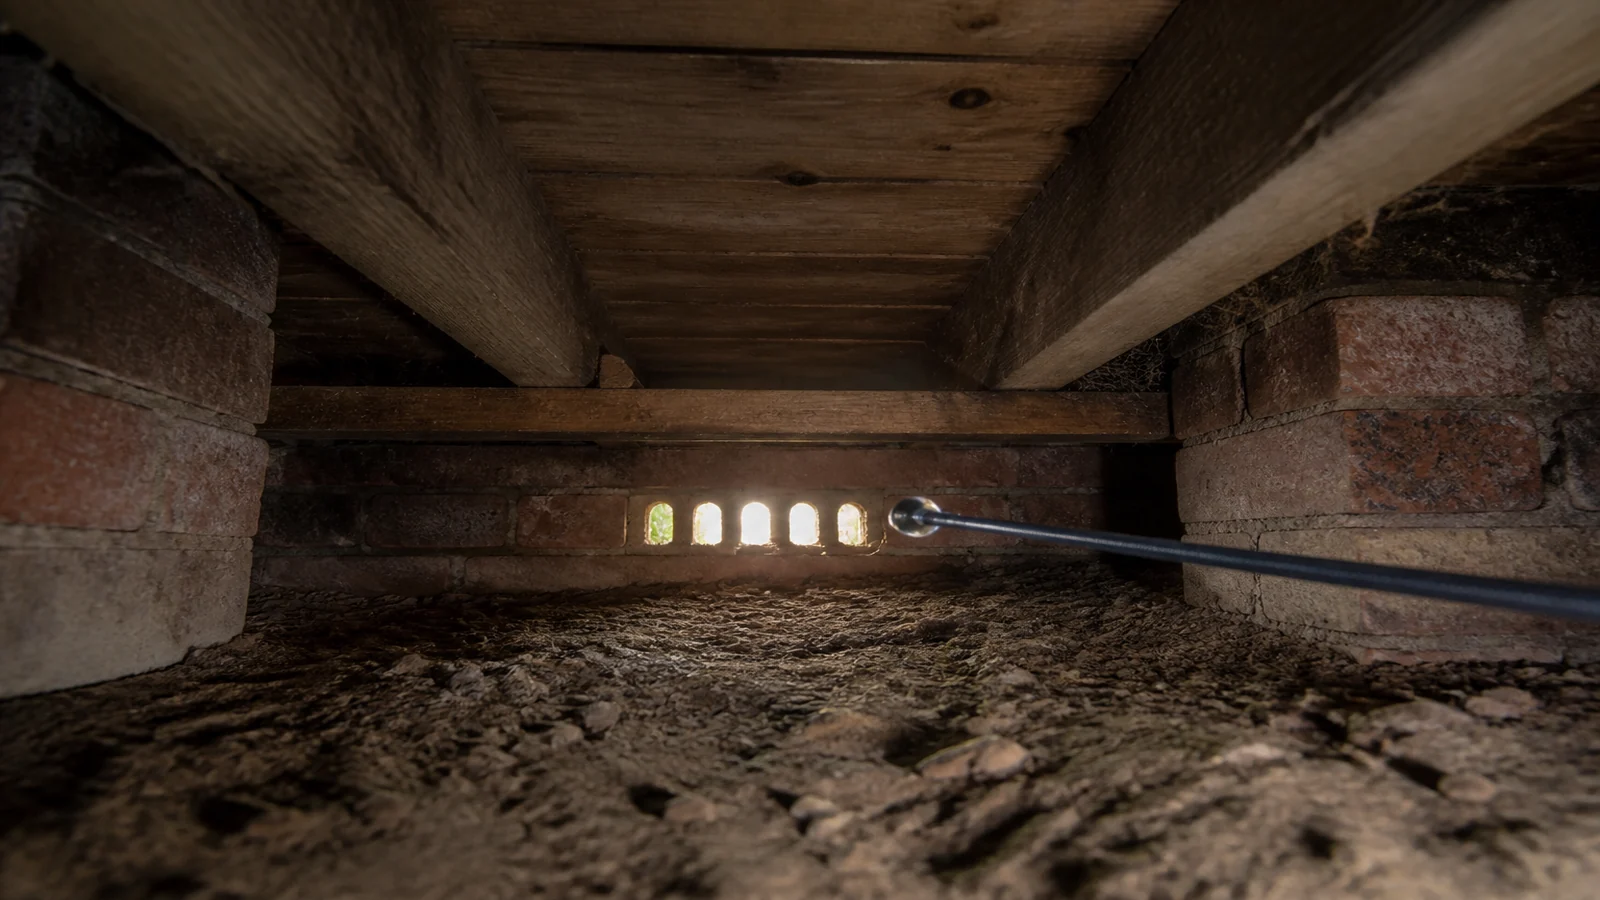
Suspended Timber Floor Void Inspection Camera: What to Look For
A suspended timber floor void inspection camera can show joists, sleeper walls, air-brick daylight and obvious wetness through an existing vent or a small lifted board, but images cannot confirm structural capacity or name a fungus. Use the view to decide the next check: clear a blocked vent, look for a plumbing leak, or stop and bring in a timber or damp specialist.
What can a camera reveal under a suspended timber floor?
Typical useful views are the underside of floorboards, joist sides, wall plates where timber meets masonry, pipes clipped to joists, and whether daylight reaches through air bricks. You may see debris, garden soil piled against a vent, a disconnected waste, or a localised wet patch. You will not see hidden decay inside a joist, and you cannot judge residual strength from colour alone.
Moisture in older buildings has more than one cause. Historic England's advice is to diagnose before specifying treatment, rather than assuming rising damp or a product you can paint on. Read the Historic England advice on damp in older buildings before you commission a chemical damp course on the strength of a musty smell.
Which access point causes the least damage?
Prefer an existing opening. An air brick, a redundant floor vent, a cupboard with a service hatch, or a board that is already loose will tell you more with less cutting. If you must lift a board, choose one near the wall, away from the centre of a span, and only after you have scanned for cables and pipes. Do not cut until services and asbestos risks are considered, including old insulating board, vinyl tiles, and textured coatings at the skirtings.
Work from a room, not from a crawl. This method is a camera through an opening, not a person in a confined space. If the void is too shallow for a probe to turn, stop rather than chiselling a larger hole on speculation.
Note which way the joists run and which wall the air brick sits in. A wet patch against an external wall after rain can be splashback or a failed damp proof at the masonry, while a wet patch under a bathroom waste is a plumbing problem even if the air bricks are clear. Write that distinction down before anyone sells you a whole-house treatment.
How do I read signs of moisture, blocked ventilation or timber decay?
Use a simple diagnostic ladder. If air bricks are buried, painted solid, or show no daylight when you look from inside, then ventilation is restricted; the next step is to clear or restore vents before any timber treatment. Restricted sub-floor ventilation can contribute to damp conditions and timber risk, which is why the Property Care Association guidance on sub-floor ventilation asks owners to keep those paths open.
If one joist bay is wet beneath a bathroom or kitchen while neighbouring bays are dry, then look for a plumbing or waste leak rather than a whole-house damp proof failure; the next step is a plumber and a dry-down, not a new membrane. If joist ends in the wall are dark, cracked, or missing their arrises while the mid-span looks sound, then the bearing needs a professional timber inspection; the next step is not a DIY splice from a camera still. If you see soil, stored rubble or a later concrete floor blocking the void, then airflow may have been cut by an extension; the next step is to map remaining vents before filling more of the underfloor space.
What can look worrying but may be harmless?
Surface dust, old lime stains, harmless mould on forgotten cardboard, and historic whitewash on sleeper walls often look dramatic on a close camera. So does the powdery face of very old brick. White crystal on masonry can be salts from past moisture that is no longer active. A slightly uneven board can be original construction, not collapse.
Harmless does not mean ignore everything. Fruiting bodies, actively wet rot, a joist that has lost its bearing, or a bounce that has recently worsened are not camera-only problems. Record what you saw, including which bay and which air brick, then decide whether the next person is a plumber, a timber specialist, or a structural engineer.
When should I stop and arrange a professional inspection?
Stop when supports look failed, when an active leak is wetting the void, when you would have to crawl, or when the camera cannot reach the wall plate that actually carries the joists. Images alone cannot confirm structural capacity or fungal species, so do not let a still photograph become a repair specification.
Arrange a professional inspection if floors have dropped, if doors are binding because the floor has moved, if you smell a persistent must after vents are cleared, or if a previous damp treatment was specified without anyone looking under the boards. A camera survey is a planning tool for that visit, not a substitute for it.
Who this inspection method is not for
This article is not for anyone who needs a structural calculation or a fungal laboratory identification. This article is not for confined-space crawling under a floor. It is also the wrong method for a solid concrete ground floor, for a suspected gas leak, and for lifting a whole room of boards to install insulation without a ventilation plan.
When the job should stop
Stop if you would have to cut boards before services and asbestos risks are considered. Stop if there is an active leak or a visibly failed support. If cold floors and a musty smell remain after vents are open and no leak is visible, hand the stills to a damp and timber surveyor rather than buying a treatment from an advert.
A slim dry-use camera is enough for a first look through an air brick or a single board. See the ARTICAM articulating inspection camera if that is the access you have. If the moisture track seems to come from above rather than the void, compare with a roof void leak inspection before you open more of the floor.